This summer has been incredibly busy with preparations for our daughter's wedding, the purchase of her and her fiancé's first home, visitors from around the world, business trip to Costa Rica and Honduras for Michael (even though he's officially retired) and ongoing work at the house.


I have a another wing chair slipcover (and tutorial) almost finished but I just needed a break from that project. I saw a darling burlap purse online but it was $95!!!! Now, I can afford $95 for a purse but it was more of a challenge to see if I could make one as cute for a whole lot less than $95. I had just purchased chocolate brown burlap the day before beginning this project along with a darling pink chintz type print for lining. I was originally going to make another tote like the one I made here:

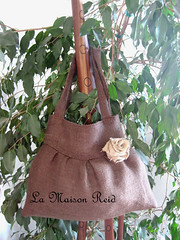
....but came up with something different:
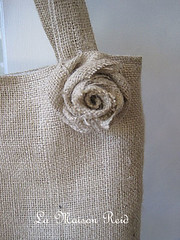
Chocolate Brown Burlap Purse with Shabby Rose Tutorial:
TERMS OF USE: This pattern is offered for free with the understanding that my readers will use it for personal use only. Please do not sell this pattern, bags made from this pattern, or bags made from modifications to this pattern (example: enlargements, wider/longer straps, etc.). If you make this purse and post about it, the design credit must be given to Nancy at La Maison Reid with a link to this pattern. I would like to say that I really appreciate the overwhelming support that I have received for putting this Burlap Bag with Shabby Rose out there for everyone to use. It’s immensely gratifying to receive such gracious emails from so many people who are using and enjoying it for themselves.

I made this bag for about $5.50. It was pretty easy to do. I started by cutting the bottom front and back. Cut two pieces 10" high x 18" wide. I made six pleats along the top, each pleat facing the center of the rectangle. After these were pinned in place I basted it on the sewing machine. Do this for both the front and back of the purse. Notice that the top is now curved. The piece that goes on top of this will need to be fitted.

Now measure the width of top (above the pleats) along the curve line with a soft tape measure. Mine measured 13" but this size will depend on how deep you make your pleats. Cut two pieces of burlap 5" tall x width of your top (5"x 13" for mine). Now...when I went to pin this piece on it appeared to be WAY too small. Don't freak out! Just follow the curve at the top and ease it into place. Sew these two pieces together. Now you can start on one side of the purse and sew down one side seam, the bottom seam and then up the other side seam in one swoop! Make your lining exactly like the outside and place it inside, wrong sides together.

I love this lining. Isn't it sweet? Before you sew the lining to the outside make your straps. I cut two strips 22"x3". Sew with 1/2" seam and turn inside out. Put these in between the lining and the outside and sew it all up. On this tote I put the straps side to side rather than front to back like I did in the first Burlap Tote (Tutorial). This is more of a "purse" while the first one I made is more like a "tote."

Now make a shabby rose! Easy to do and lots of good tutorials out there. Two of my favorite video tutorials are here:
Freckled Laundry
and
Crystelle Boutique
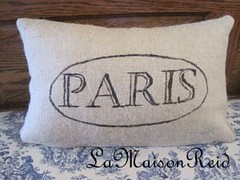
I made tiny shabby roses with grosgrain ribbon for this French Feedsack Style Pillow . They are so cute on so many different things.
Freckled Laundry
and
Crystelle Boutique
I made tiny shabby roses with grosgrain ribbon for this French Feedsack Style Pillow . They are so cute on so many different things.


Now that you can readily get colored burlap it will be fun to make unique and personal gifts. If you use this tutorial and make one for yourself, I'd love to see what you come up with. As usual, if you need any tips or advice or encouragement, I'd be happy to help. Just send me a note.
xox
Nancy
Follow up May 2, 2011
I'm still getting so many questions on how to make this purse so I thought I'd let you know that I've made some changes to and made it even better!
1) I added a magnetic snap. Many tutorials online on how to do this.
2) I added an inside pocket.
3) I made the straps wider and interfaced them as my first purse did not hold up very well without the extra fabric inside. After experimenting I learned that I had to turn the straps right side out after sewing them and THEN cut pelon/interfacing a tad narrower than the strap. I put a safety pin on one end of the interfacing and weave it through to the other end. This seemed to be the only way I could get interfacing in otherwise it was a mess trying to turn them inside right if the interfacing was already sewn in.
4) round the corners a bit so they're not so dog-eared. Follow this tutorial of mine about making better corners on pillows. There is a good photo of how to measure from the corners to get the rounded look:
http://lamaisonreid.blogspot.
only use these measurements:
measure 3 1/2" from the bottom corner up and 3 1/2" from bottom corner across the bottom. Make dots here. From the corner towards the middle mark 1" in towards the center and using those marks as a guide for curving the corners.
5) I also use iron on interfacing on the body to give it more shape. I'm much happier with these changes!
xox
Nancy


 Posts
Posts