
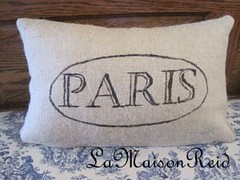
The Secret to Good Pillow Corners


I made this pillow out of Osnaburg which is one of my favorite fabrics. It has a natural, hemp or jute look to it but is soft to the touch with a nice slubby texture. Osnaburg is known as the "Mother of all Cottons" and was used as feedsacking in the 1930s through the 1950s and has really made
a fashion comeback recently.
To Make the Pillow
I cut the front and back panels for my pillow allowing 1/2" seam allowance. My pillow is 14"x14" so I cut two 15" squares.

To get great corners without floppy "dog ears" I placed the front and back panels together

and then folded both panels from the top down once.

Fold left to right once

Mark 1/2 way down the right side. Mark 1/2 way across the bottom.
Now mark 1/2" in from the lower left corner. (can you see the little dot in the bottom right corner?)Draw a line from both halfway marks to the corner 1/2" mark and cut along this line.
This is the magic move to making a good pillow.
I downloaded a pretty graphic from Graphics Fairy and printed
it on transfer paper then ironed it on. (Don't forget to print a mirror image!)


I didn't have enough grosgrain ribbon to sew this around in one piece
with folded mitered edges which might have been easier but
I wanted to finish the pillow without making a trip to
the fabric store so I mitered the ribbon and sewed it on using a fine
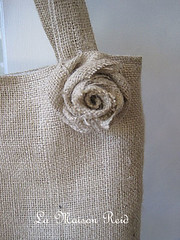
buttonhole stitch at the miters. Then I made some silk ribbon rosettes.
I just learned how to do this . There are many good tutorials on the web.


Sooo beautiful!!! I love your rosettes!! I am trying to learn to make them myself. Your friend will definitely love her gift!!! If not I will forward my address, lol!!! :))
ReplyDeleteHave a wonderful day!!
~ Michella ~
~ ~ xo ~ ~
Beautiful! Kudos...Thanks for sharing the lovely creative work. good tutorial!
ReplyDeleteLoVe it!
ReplyDeleteI LOVE this idea!! AND your blog! I'm your newest follower! Thanks so much for sharing!
ReplyDeletesmiles!
www.blackberryvine.blogspot.com
I love the pillow. You did a great job. Where do you get your fabric? Kathy
ReplyDeleteThe pillow is so cute, great tutorial!
ReplyDeleteHugs
Charo
I'm getting ready to make a pillow today and will gladly try out this tapering corner tip. I've been fussing with pillow corners for years. Thanks for sharing! Pam @ Sallygoodin
ReplyDeleteApplause, applause! I'm so glad you had another great project to link up today. And where do you get this Osnaburg??
ReplyDeleteI love the little roses in the corners. So cute!
ReplyDeleteI think I can follow this - very clear! All the pillow possibilities are forming up in front of my eyes.......
ReplyDeleteLOVE IT, LOVE IT, LOVE IT! :) Thanks for linking it up to Treasures and Trinkets Thursday! :) I know I'm on vacation, but I had to sign in to see what everyone had linked up! :) I love your trick for nice pillow corners, I'll definitely use that one!
ReplyDeleteI can't wait to show you guys all my pics from this trip..we're in Charleson, SC! :)
Blessings & Hugs
Missy
Beautiful!
ReplyDeleteI'm coming from NFF. Thanks for the easy-to-follow-tutorial.
It is absolutely gorgeous! So much beautiful work and detail, I love the rosettes. Hope you have a wonderful weekend ~ Tina xx
ReplyDeleteLove your pillow. Thank you for the easy tutorial. I'm inspired to do this project. I'm your new follower from NFF.
ReplyDeleteYou have the best ideas! I love the pillow and the watering can is so cute! You must have an amazing home!
ReplyDeleteYour pillow is beautiful. I would love that fabric that you described, I'm not sure that I have seen it though.
ReplyDeleteThank you for stopping by my blog and leaving so many sweet comments. I have not been visiting in return, because I had the comment monitor on and I was not monitoring them, I didn't know how to. I suddenly figured it out and there were all of your lovely comments. I do appreciate them, my friend. So now I will be over to visit.
Hugs, Cindy S
This is a beautiful pillow...I love your choice of label too. Really great tutorial. I saw you on a comment on blue artichoke interiors and Castroville caught my eye...I live on the Monterey Peninsula.
ReplyDeleteHolly
504 Main
Thank you for YOUR sweet comments on my blog! It thrills me when someone I don't know visits my teeny little blog with 10 followers :) You were nice to visit, thank you! I'm gonna make my next post (tomorrow) about that corbel. Thanks for reminding me. You have a delightful blog, btw.
ReplyDeleteWendy
Hi there!!
ReplyDeleteSuper cute pillow! I always have trouble with my corners too:)
Thanks for sharing!!!
That is really cute and looks pretty easy to make. I LOVE the small roses that you attached to it! Thank you for linkin' to It's Stinkin' Cute Craft Thursday!
ReplyDeleteCute pillow Nancy! I like this!
ReplyDeleteYou asked if I eyeball my pleats? Yes! I don't measure anything. Sometimes I see one pleat a little off, but I don't let it bother me. That's why I hold down about 3 at a time, it helps me see that they are the same size.
Don't make them separate. Just sew those things straight on to your project! Ha! You do beautiful work.
Kelly
Just wanted to let you know that I featured this today on FTF! Thanks for linking up and if you would like a featured button stop by and grab one!
ReplyDeleteYou always make this look sew easy!!!!
ReplyDeleteLisa
P.S. I always thought I was a follower, but now it's official!
ReplyDeleteLisa
Thanks for the tip about the corners - I don't like those floppy dog-ears! Congratulations on your finish!
ReplyDeleteGorgeous! Love the roses :)
ReplyDeleteThanks for visiting my blog.
Very nice pillow and thanks so much for the instructions.. I have two really nice and really old kitchen dish towels I got while in Italy and this might be the answer.. make pillows from them...I can get 4.. hmmm?
ReplyDeleteThanks so much for the inspiration..
Sandy
thewondersofdoing@blogspot.com
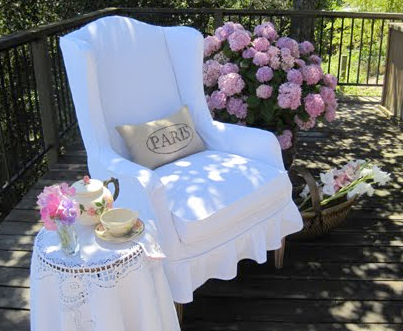
Love your pillow I believe it completes the rocker by adding a simple country charm
ReplyDeleteThis is so sweet! The little roses add just the right touch. Thanks for sharing. Happy Sewing! :o)
ReplyDeletewww.seamsinspired.com
Gorgeous! I love the ribbon around the graphic, that's a great idea!
ReplyDeleteAnother fabulous idea! I LOVE it! :]
ReplyDeleteI knew about cutting off the dog ears. I never thought to fold the fabric and make only one cut! Genius. Looks great also.
ReplyDeleteI’m having a new link party “Cheap Thrills Thursday” starting the 29th. It’s for creative ideas that cost under $20. If you have a project you’d like to share, I’d love for you to stop by and join in!
Kat
www.BlackKatsDesign.blogspot.com
This comment has been removed by a blog administrator.
ReplyDeleteCute pillow. Great job. Thanks for sharing.
ReplyDeleteLove the pillow! Thanks for linking @Creative Itch's "Sew Cute Tuesday"!
ReplyDeleteI love it!! Want to make me one? :) Thanks for linking to Transform Tuesday. Can't wait to see what you link up next.
ReplyDeleteThis is so beautiful and I know your friend will be thrilled with her gift!!! Absolutely precious!!!
ReplyDeleteHugs,
Cindy
Lovely pillow and great tutorial! Thanks for sharing!
ReplyDeleteJeanine
Such a beautiful pillow! How nice that you offered a tutorial as well!!
ReplyDeleteI see that you are using my linen background on your blog, thank you so much for selecting one of my blog themes! It looks like you are missing a bit of the code, there should be a little tag displaying in the upper left hand corner giving me credit for the design. This can happen during the cut and paste process, if you miss even a tiny bit of the code it won't display properly. To remedy that, just delete the code and then add the background again. I hope this helps!
Thanks so much for playing along for Brag Monday.
Loved the tutorial, and the graphic worked great! Visiting from Graphics Fairy!
ReplyDeleteTrès belle réalisation et merci pour le tuto.
ReplyDeleteHave a nice day !
This pillow is SO CUTE!
ReplyDeleteI adore that graphic and have made several placemats out of it. Unfortunately, I don't sew, so I'm especially in awe of talented women like you : )
Had fun stopping by your blog this morning and decided to consider myself one of you followers. Thanks so much for stopping by Starview Sonnet and leaving such kind words aobut my cute little vintage bed bench. What a fun project and thank goodness my husband was willing to lend a hand on that one.
I look forward to more of your projects and creativity.
Cori
Dear Nancy, what beautiful things you make.
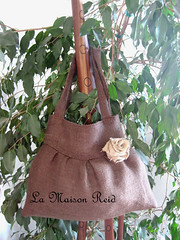
ReplyDeleteI love the bag and the pillow, they are such trasures to me.
Your friend
M
Looking forward to your next project.
ReplyDeleteYou make it look so easy, But I have to make this pillow.. I am into linen, but cost to much, I love muslin and tranquilty.. Burlap textures and I am starting to like words to express myself.
ReplyDelete