Monday, July 26, 2010

Coffee Filter Frame

Coffee Filter Frame Tutorial
When I saw a coffee filter wreath for the first time yesterday (I know...where have I been...under a rock?) I just knew what I was going to do with that great idea.  My daughter just got engaged and had her engagement photos done and this next weekend we are having a gathering of friends and relatives to celebrate.

So far I have just made one wreath but I plan on making at least one other.  The photos are so good it was hard to chose which one to use.  Here are some of the photos I like.  There were 128 and I loved several but here are some I'll use for the party.  They were taken in San Francisco.  Wish I could show you ALL of them.

artistic engagement photo.  Brie and David Nesting
This one I will do with filters soaked in coffee to go with the black and white photo.

Engagement photos Brie and David Nesting
This is the one in the above wreath that I made today.  I used red food coloring to make "pink roses" to go with her pink top.

artistic engagement photo.  Brie and David Nesting Brie and David Nesting Engagement
There are some photos under the Golden Gate Bridge but I don't have those yet.

coloring coffee filters for wreath
 To make the frame I put coffee filters in a baking dish.  I don't use these anymore as I have a fancy espresso machine.  I soaked some in coffee and others in hot water with red food coloring and a little coffee.  I didn't want the red to be too pink or too red but a bit aged looking.  I let the soup brew for 1/2 hour and drained and baked at 250 degrees for about 40 minutes.  Then I folded them in quarters.


I cut a cardboard ring and hot-glued the filters to it.  Taped the photo on the back and voilĂ .  I'll get some ribbon to hang these with.  I also made huge Victorian tissue roses for the party.  Can't wait.  I know it will be fun.

Coffee Filter Engagement Party Frame
Here is one with both coffee stained filters and pink filters
  

Coffee Filter Fun
 This one is mostly coffee stained filters with a few pink.

I also made huge Victorian tissue roses for the party.  Can't wait.  I know it will be fun.

Thursday, July 22, 2010

Burlap Tote with Shabby Rose: Another Tutorial!

My friend Mary had a birthday last week so I 
and
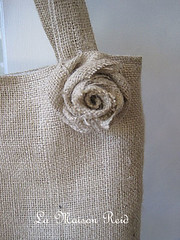
this tote
 I was pretty happy with this, my first attempt at a tote bag.
Burlap Tote with Shabby Rose Tutorial

I started with two 15" squares of burlap. The two pieces are
cut together, right sides together.


how to make a flat bottom tote
In order to have a flat bottom tote rather than a flat sided tote you need to cut out the corners of both the front and the back of the tote. I cut a 2" x 2" square from each corner.  Now sew both side seams and the bottom seam.  

Now you'll "square the corners."   Open your 2" corners.  In the above photo the side seam is in my left hand and the bottom of the tote seam is on the right. 

Match the side seam and bottom seam and stitch this seam with 1/2" seam.  This will form
the bottom of the tote.  For the lining I just duplicated the tote, same size but a print fabric.
How to sew the lining into a tote bag
Put the lining inside the tote, wrong sides together and fold down 1/2" of the lining and 1/2" of the burlap into the inside.  Cut two 4" x  22" strips of burlap for the straps and sew a
center seam.  Turn them right side out.
 
Pin the straps in between the lining and the tote and stitch the two together.

I loved the burlap rose tutorial here at Crystelle Boutique
and I attached it with a hot glue gun. 


La Maison Reid
 As you can see this is a pretty easy, straightforward project.  I plan on making several more although I may try one that is more square and maybe a one strap instead of two tote.
Mary loved both the tote and the pillow!

Thursday, July 15, 2010

French Style "Feedsack" Fabric Pillow: A Tutorial on Cutting Perfect Pillow Corners


The Secret to Good Pillow Corners
I made this pillow out of Osnaburg which is one of my favorite fabrics.  It has a natural, hemp or jute look to it but is soft to the touch with a nice slubby texture.  Osnaburg is known as the "Mother of all Cottons" and was used as feedsacking in the 1930s through the 1950s and has really made
a fashion comeback recently.

To Make the Pillow

I cut the front and back panels for my pillow allowing 1/2" seam allowance.  My pillow is 14"x14" so I cut two 15" squares.


To get great corners without floppy "dog ears" I placed the front and back panels together

 
and then folded both panels from the top down once.


Fold left to right once
  

Making Good Pillow Corners
Mark 1/2 way down the right side.  Mark 1/2 way across the bottom.  
Now mark 1/2" in from the lower left corner.  (can you see the little dot in the bottom right corner?)Draw a line from both halfway marks to the corner 1/2" mark and cut along this line.
This is the magic move to making a good pillow.


I downloaded a pretty graphic from Graphics Fairy and printed
it on transfer paper then ironed it on. (Don't forget to print a mirror image!)


I didn't have enough grosgrain ribbon to sew this around in one piece 
with folded mitered edges which might have been easier but
I wanted to finish the pillow without making a trip to 
the fabric store so I mitered the ribbon and sewed it on using a fine 
buttonhole stitch at the miters.  Then I made some silk ribbon rosettes.
 I just learned how to do this .  There are many good tutorials on the web.


  This is a birthday present for a good friend.  Now I'll have to make one for myself!

Tuesday, July 13, 2010

Antiqued Watering Can


 I recently purchased a lovely old watering can and wanted to personalize it.


 It was actually quite nice as it was but I thought it might be more"me" if
I added a French floral label.


 I printed a Graphics Fairy label
 on transfer paper, taped it on the watering can

 and ironed it on.


The effect is very subtle...just what I was after.


I think I may have to do something like this to my larger watering can!

Tuesday, July 6, 2010

Make Your Own Chandelier Chain Cover

You can make your own chandelier cover in less than one hour.
Make it personal to match your decor.

Make your own Chandelier Chain Cover


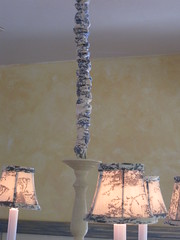
 Before
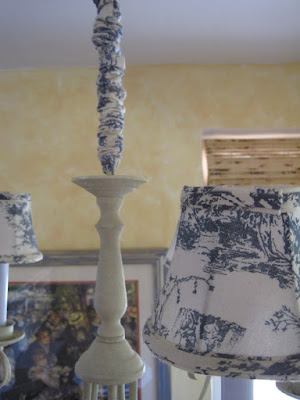
 Let's face it.  There is nothing attractive about chandelier chains and wires so I decided to make my own chandelier chain cover to match my breakfast nook toile bench seats and matching toile lampshades.

I had leftover toile from making my breakfast nook box cushions.  I found matching toile shades for my chandelier on the internet at a price which was too good to pass up and saved me having to make them.

My chain is about 20" long.  I cut a 4" strip two and one half times the length of my chain to allow for plenty of gathering.  I hemmed both the top and bottom and sewed a scant 3/8" seam.


Once the "tube" was sewn I turned it with a chopstick.  I just turned one end in and grabbed it inside with the chopstick and pushed until it was inside right.
You will have to remove your chandelier from the ceiling.  Make sure
the power is turned off, first!


In order to get the chain and wires through I tied a piece of string to a rod and pushed that all the way through.  


Tie the string to the wire and chain. (Photo only shows string tied to wire.  Had to do this step twice to get it right!)


Now pull the string until all of the wires and chain come out
the other end.  You're almost done!  All you have to do is
attach your chandelier back to the ceiling.

You can make this chandy chain cover and install it in less
than one hour and you can personalize one for every room in your home.
Oh...it took longer to write this post than it did
to make and install this chandelier chain cover!

Related Posts with Thumbnails